📢:本文为实操记录,练习环境为RHEL7.6(本地虚拟机),腾讯云Centos7.6实操安装成功。不正之处望指出。
关于虚拟机安装Linux操作系统,点击查看
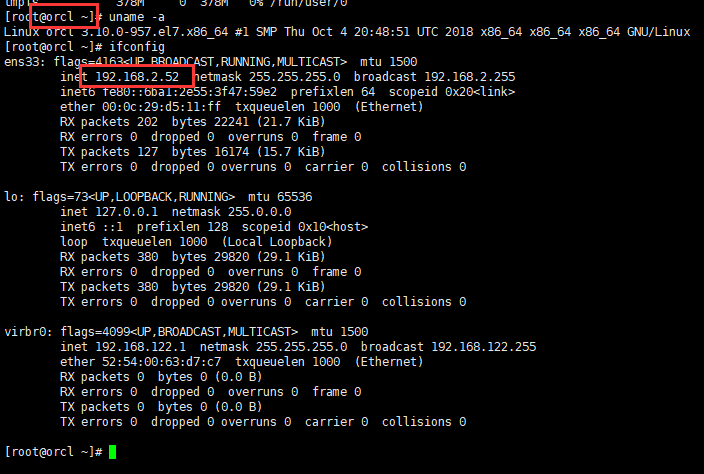
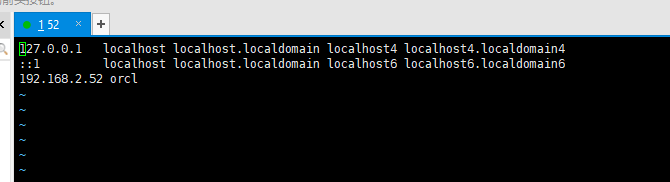
Linux主机配置 主机名和网络配置 1 2 3 4 5 6 cat <<EOF >>/etc/hosts # # 192.168.1.79 orcl79 # EOF
hosts文件配置
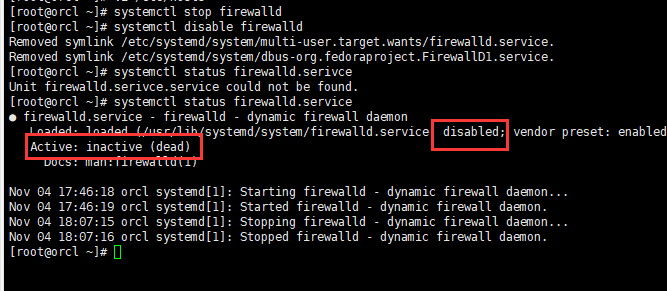
防火墙配置 1 2 systemctl stop firewalld systemctl disable firewalld
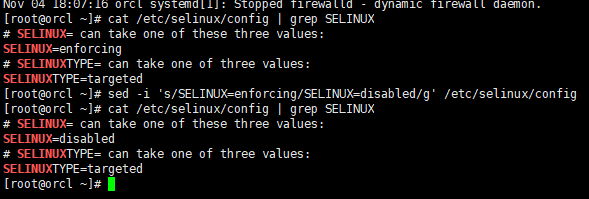
SELINUX配置 1 sed -i 's/SELINUX=enforcing/SELINUX=disabled/g' /etc/selinux/config
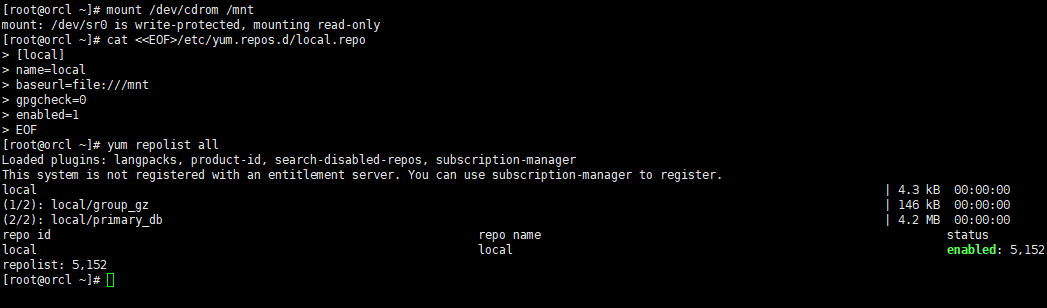
挂载镜像 1 2 3 4 5 6 7 8 mount /dev/cdrom /mnt cat <<EOF>/etc/yum.repos.d/local.repo [local] name=local baseurl=file:///mnt gpgcheck=0 enabled=1 EOF
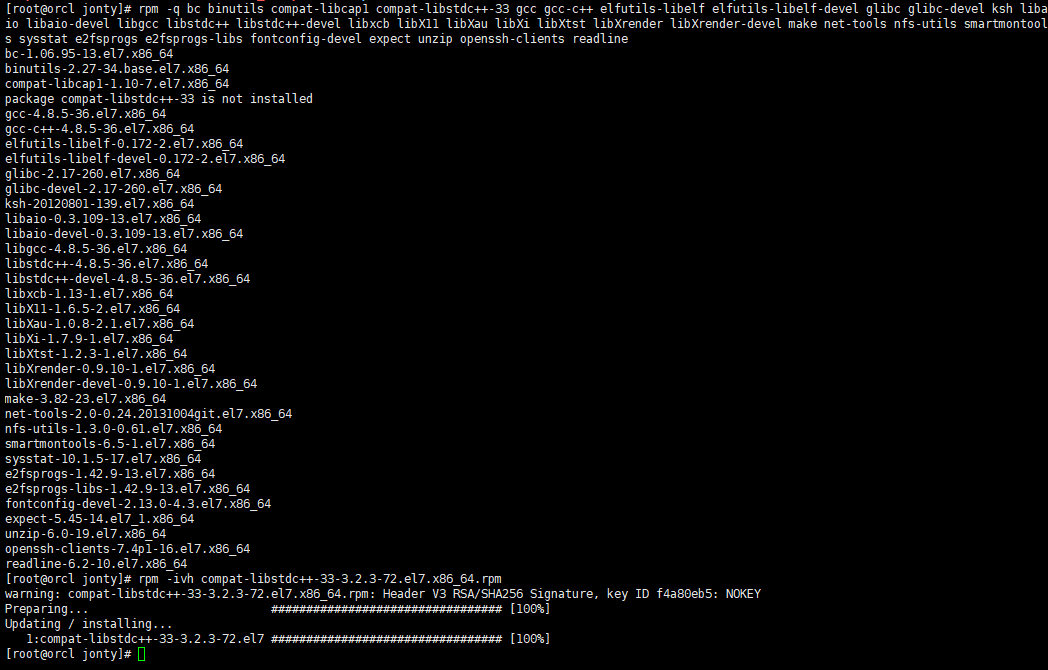
安装依赖包 1 2 3 4 5 6 7 8 9 10 11 12 13 14 15 16 17 18 19 20 21 22 23 24 25 26 27 28 29 30 31 32 33 34 35 36 yum install -y bc \ binutils \ compat-libcap1 \ compat-libstdc++-33 \ gcc \ gcc-c++ \ elfutils-libelf \ elfutils-libelf-devel \ glibc \ glibc-devel \ ksh \ libaio \ libaio-devel \ libgcc \ libstdc++ \ libstdc++-devel \ libxcb \ libX11 \ libXau \ libXi \ libXtst \ libXrender \ libXrender-devel \ make \ net-tools \ nfs-utils \ smartmontools \ sysstat \ e2fsprogs \ e2fsprogs-libs \ fontconfig-devel \ expect \ unzip \ openssh-clients \ readline* \ psmisc --skip-broken
安装缺少的compat-libstdc++包
1 2 3 4 rpm -ivh compat-libstdc++-33-3.2.3-72.el7.x86_64.rpm rpm -q bc binutils compat-libcap1 compat-libstdc++-33 gcc gcc-c++ elfutils-libelf elfutils-libelf-devel glibc glibc-devel ksh libaio libaio-devel libgcc libstdc++ libstdc++-devel libxcb libX11 libXau libXi libXtst libXrender libXrender-devel make net-tools nfs-utils smartmontools sysstat e2fsprogs e2fsprogs-libs fontconfig-devel expect unzip openssh-clients readline
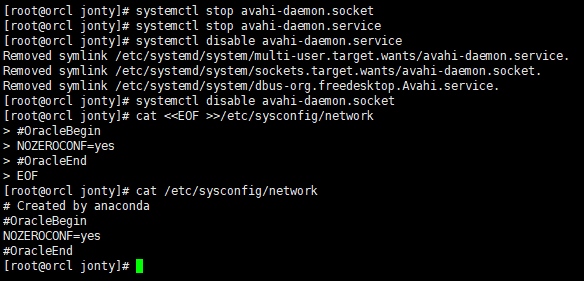
配置ZeroConf 1 2 3 4 5 6 7 8 9 10 11 12 # systemctl stop avahi-daemon.socket systemctl stop avahi-daemon.service systemctl disable avahi-daemon.service systemctl disable avahi-daemon.socket # cat <<EOF >>/etc/sysconfig/network # OracleBegin NOZEROCONF=yes # OracleEnd EOF
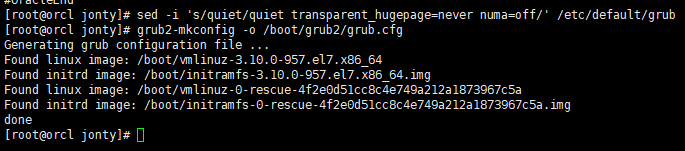
关闭透明大页和numa 1 2 sed -i 's/quiet/quiet transparent_hugepage=never numa=off/' /etc/default/grub grub2-mkconfig -o /boot/grub2/grub.cfg
配置系统参数文件 1 2 3 4 5 6 7 8 9 10 11 12 13 14 15 16 17 18 19 20 21 22 23 24 25 26 27 28 29 30 31 32 33 34 35 36 37 38 39 40 41 42 43 44 45 46 47 48 49 # memTotal=$(grep MemTotal /proc/meminfo | awk '{print $2}') totalMemory=$((memTotal / 2048)) shmall=$((memTotal / 4)) if [ $shmall -lt 2097152 ]; then shmall=2097152 fi shmmax=$((memTotal * 1024 - 1)) if [ "$shmmax" -lt 4294967295 ]; then shmmax=4294967295 fi echo $shmall echo $shmmax # cat <<EOF >>/etc/sysctl.conf # OracleBegin # # fs.aio-max-nr = 1048576 fs.file-max = 6815744 kernel.shmall = $shmall # 单个共享内存段最大值 kernel.shmmax = $shmmax # 共享内存页数 kernel.shmmni = 4096 kernel.sem = 250 32000 100 128 net.ipv4.ip_local_port_range = 9000 65500 net.core.rmem_default = 262144 net.core.rmem_max = 4194304 net.core.wmem_default = 262144 net.core.wmem_max = 1048576 EOF # sysctl -p cat <<EOF >>/etc/sysctl.conf fs.aio-max-nr = 1048576 fs.file-max = 6815744 kernel.shmall = 2097152 kernel.shmmax = 4294967295 kernel.shmmni = 4096 kernel.sem = 250 32000 100 128 net.ipv4.ip_local_port_range = 9000 65500 net.core.rmem_default = 262144 net.core.rmem_max = 4194304 net.core.wmem_default = 262144 net.core.wmem_max = 1048576 EOF
1 2 kernel.shmall = $shmall # 单个共享内存段最大值 kernel.shmmax = $shmmax # 共享内存页数
配置系统资源限制 1 2 3 4 5 6 7 8 9 10 11 cat <<EOF >>/etc/security/limits.conf oracle soft nofile 16384 oracle hard nofile 65536 oracle soft stack 10240 oracle hard stack 32768 oracle soft nproc 16384 oracle hard nproc 16384 oracle hard memlock 8000000 oracle soft memlock 8000000 EOF # 单位kb 略低于内存
1 2 3 4 5 6 7 8 9 10 11 12 13 14 15 16 17 18 19 20 cat <<EOF >>/etc/security/limits.conf # OracleBegin oracle soft nofile 1024 oracle hard nofile 65536 oracle soft stack 10240 oracle hard stack 32768 oracle soft nproc 2047 oracle hard nproc 16384 oracle hard memlock 8000000 oracle soft memlock 8000000 # OracleEnd EOF cat <<EOF >>/etc/pam.d/login # OracleBegin session required pam_limits.so session required /lib64/security/pam_limits.so # OracleEnd EOF
创建用户和组 1 2 3 4 5 6 7 /usr/sbin/groupadd -g 54321 oinstall /usr/sbin/groupadd -g 54322 dba /usr/sbin/groupadd -g 54323 oper /usr/sbin/useradd -u 54321 -g oinstall -G dba,oper oracle echo oracle | passwd --stdin oracle
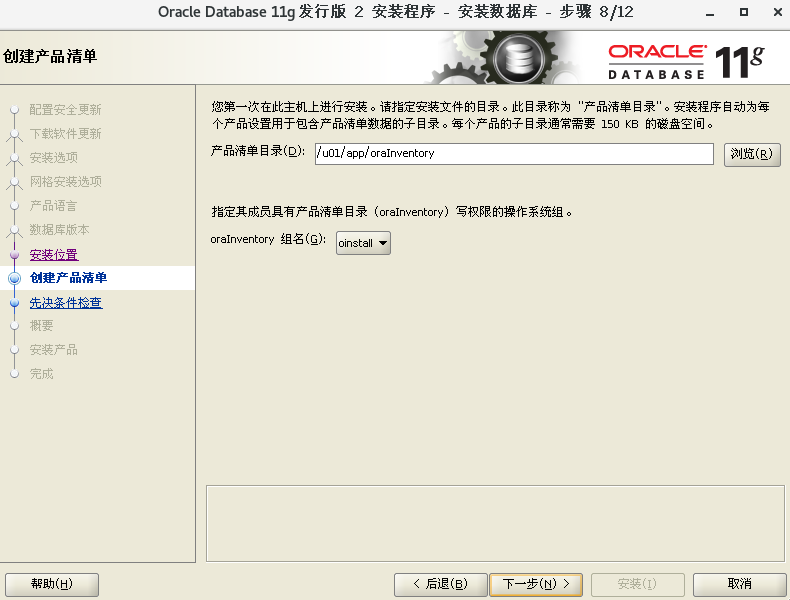
创建Oracle安装目录 1 2 3 4 5 6 mkdir -p /u01/app/oracle/product/11.2.0/db mkdir -p /u01/app/oraInventory mkdir -p /oradata chown -R oracle:oinstall /oradata chown -R oracle:oinstall /u01/app chmod -R 775 /u01/app
用户环境变量配置 1 2 3 4 5 6 7 8 9 10 11 12 13 14 15 16 17 18 cat <<EOF >>/home/oracle/.bash_profile # umask 022 export TMP=/tmp export TMPDIR=\$TMP export NLS_LANG=AMERICAN_AMERICA.AL32UTF8 export ORACLE_BASE=/u01/app/oracle export ORACLE_HOME=/u01/app/oracle/product/11.2.0/db export ORACLE_HOSTNAME=orcl79 export ORACLE_TERM=xterm export TNS_ADMIN=\$ORACLE_HOME/network/admin export LD_LIBRARY_PATH=\$ORACLE_HOME/lib:/lib:/usr/lib export ORACLE_SID=orcl export PATH=/usr/sbin:\$PATH export PATH=\$ORACLE_HOME/bin:\$ORACLE_HOME/OPatch:\$PATH alias sas='sqlplus / as sysdba' export PS1="[\`whoami\`@\`hostname\`:"'\$PWD]\$ ' EOF
Oracle软件安装 https://luciferliu.blog.csdn.net/article/details/118529918
软件包上传
解压 按顺序解压1、2软件包
1 2 3 4 5 unzip -q p13390677_112040_Linux-x86-64_1of7.zip unzip -q p13390677_112040_Linux-x86-64_2of7.zip // 授权soft to oracle chown -R oracle:oinstall /soft
安装 VNC配置 安装GNOME桌面 1 2 3 4 5 6 7 8 9 # 列出的组列表里有GNOME Desktop。 yum grouplist # 安装之 yum groupinstall -y "GNOME Desktop" # 安装完成后,修改默认启动方式为图形化界面 systemctl set-default graphical.target //设置成图形模式 # 如果要换回来 systemctl set-default multi-user.target //设置成命令模式 # 然后重启系统即可
安装VNC服务 1 2 3 yum install tigervnc-server -y rpm -qa|grep tigervnc-server -- 验证是否安装成功
打开VNC服务 1 2 3 4 5 vncserver :1 # 5901 vncserver -kill :1 # 关闭 vncpasswd # 重置密码
然后配置好密码使用VNC Viewer连接远程桌面
教程 : https://blog.csdn.net/nahancy/article/details/86316971
VNC下载:链接:https://pan.baidu.com/s/1fEf87xSB09gWxwswNXFeYw
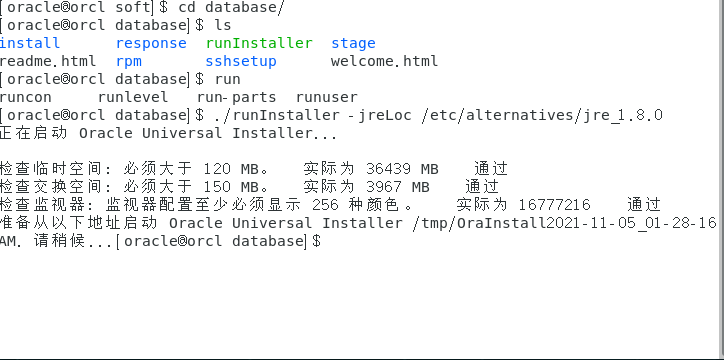
执行Oracle安装脚本 进入/soft/database
1 ./runInstaller -jreLoc /etc/alternatives/jre_1.8.0
安装检查的问题 :
1、must be configured to display at least 256 colors
解决方法:使用oracle用户打开vnserver
2、交换空间需要大于150MB
结局方法:
增加swap分区
1 2 3 dd if=/dev/zero of=/home/swapfile bs=1M count=512 mkswap /home/swapfile swapon /home/swapfile
然后修改 /etc/fstab,加上:
1 2 vim /etc/fstab /home/swapfile swap swap defaults 0 0
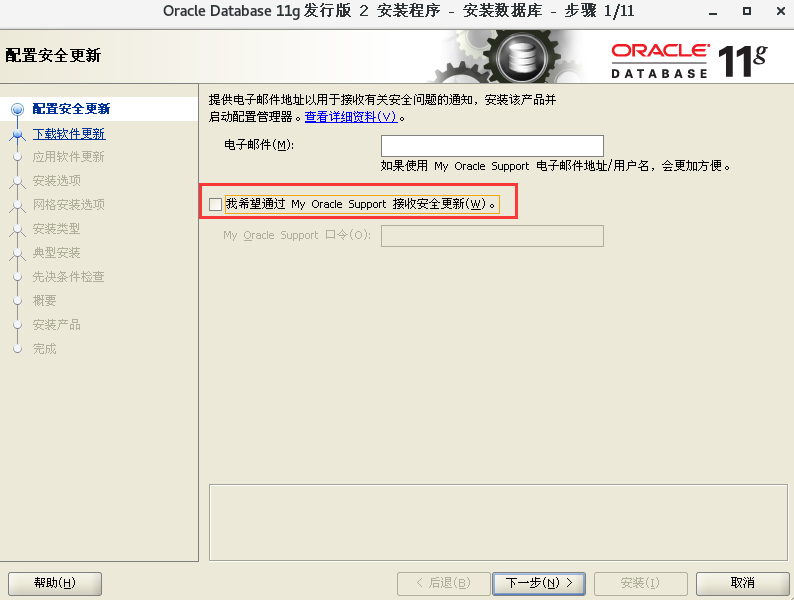
配置安全更新
下载软件更新
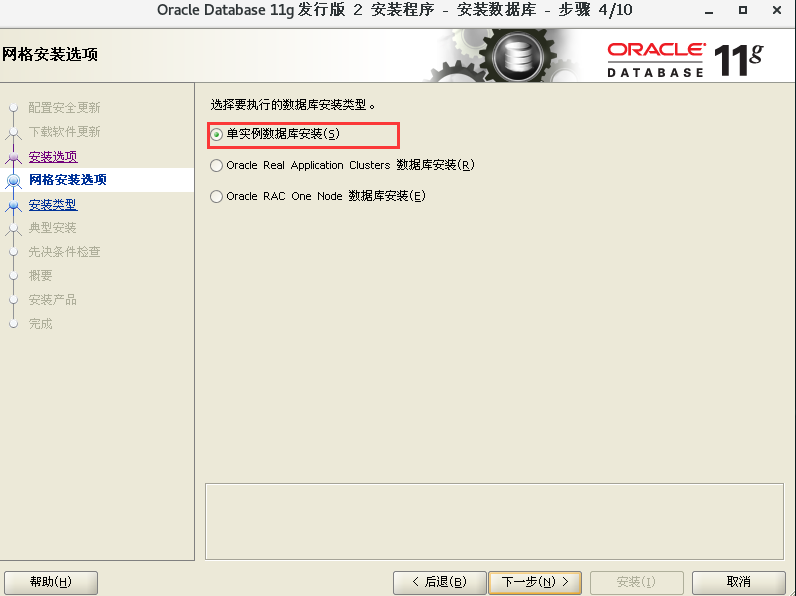
安装选项
安装选项
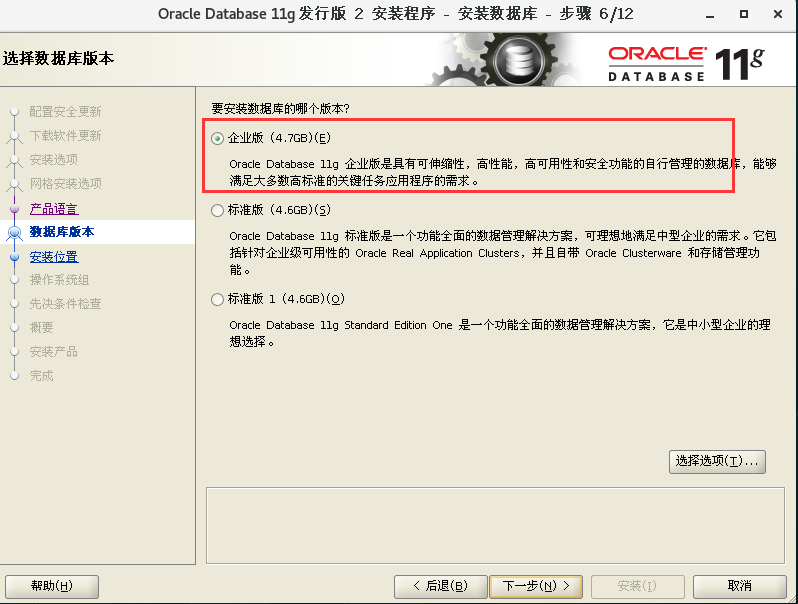
数据库版本
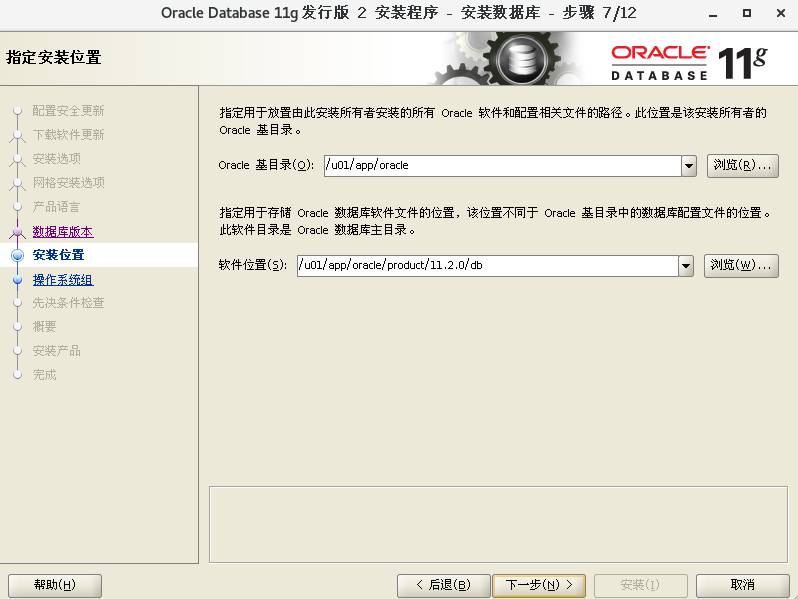
安装位置 默认
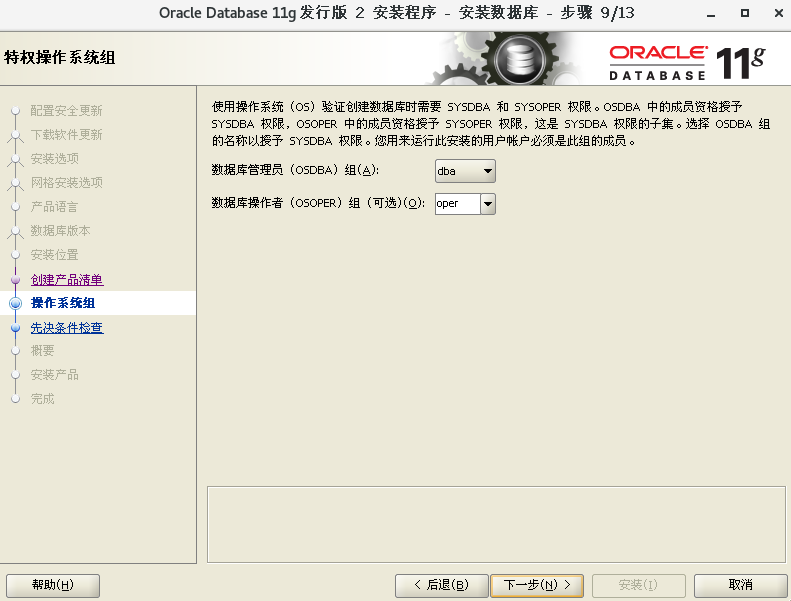
操作系统组 默认
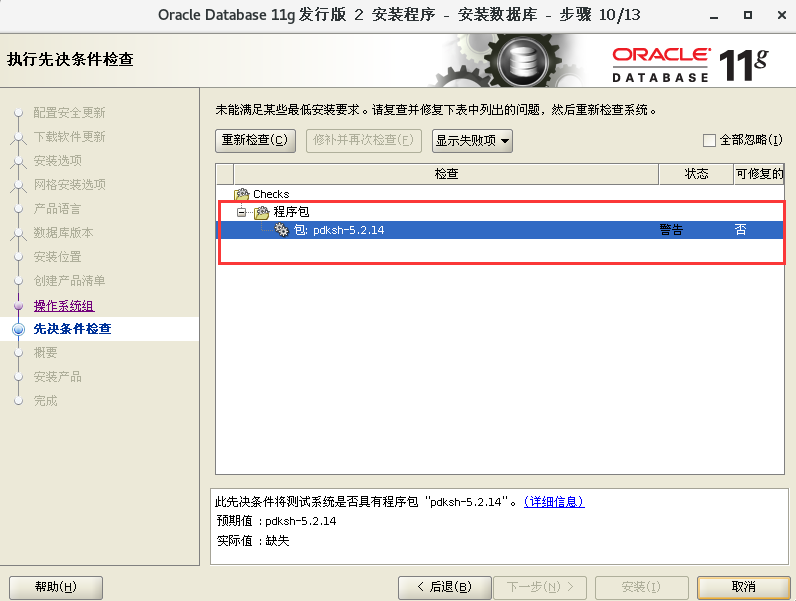
安装前检查
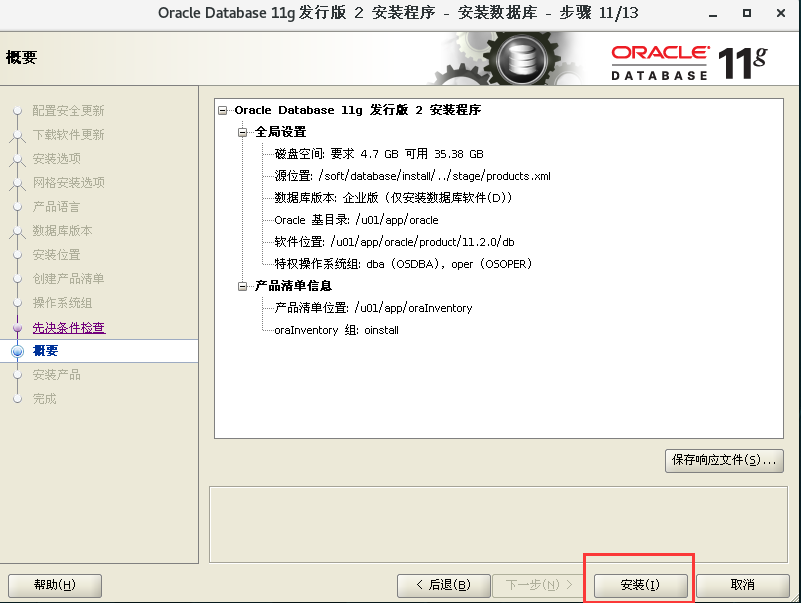
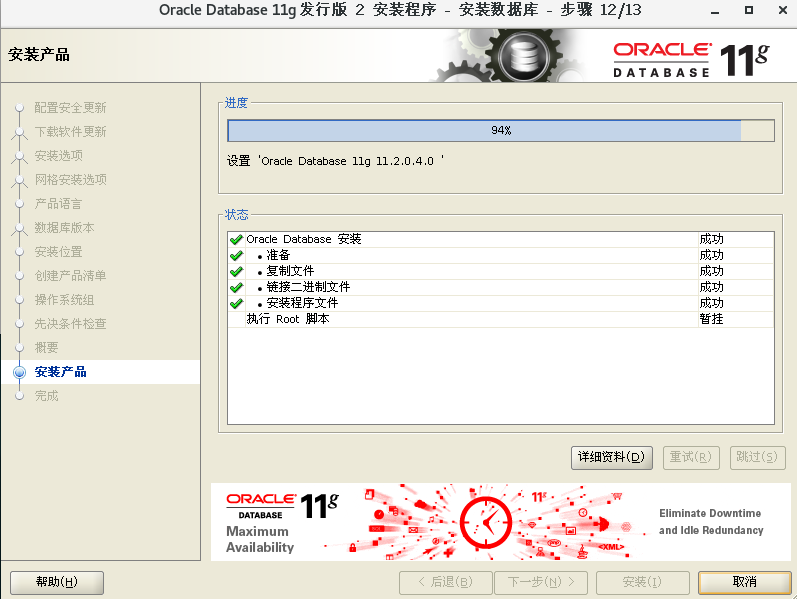
安装
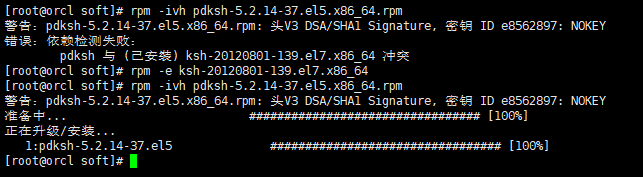
1 rpm -ivh pdksh-5.2.14-37.el5.x86_64.rpm
重新检查
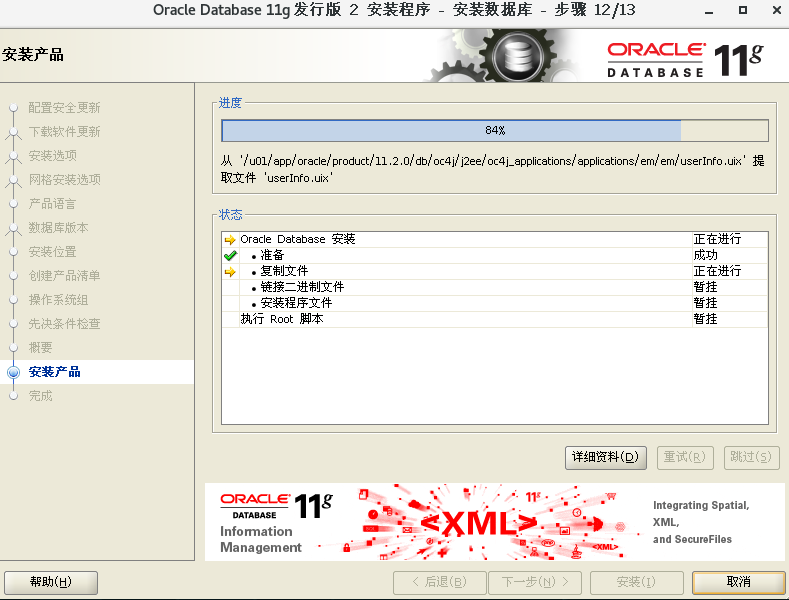
等待安装
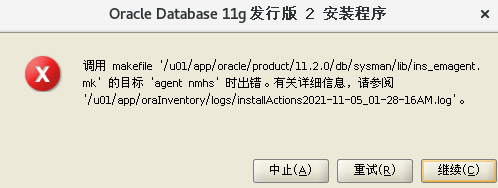
错误解决
1 2 3 su - oracle sed -i 's/^\(\s*\$(MK_EMAGENT_NMECTL)\)\s*$/\1 -lnnz11/g' $ORACLE_HOME/sysman/lib/ins_emagent.mk
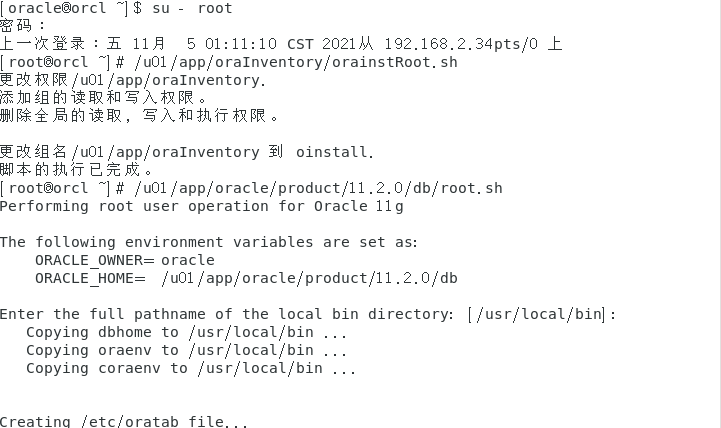
执行配置脚本 1 2 3 su - root /u01/app/oraInventory/orainstRoot.sh /u01/app/oraInventory/orainstRoot.sh
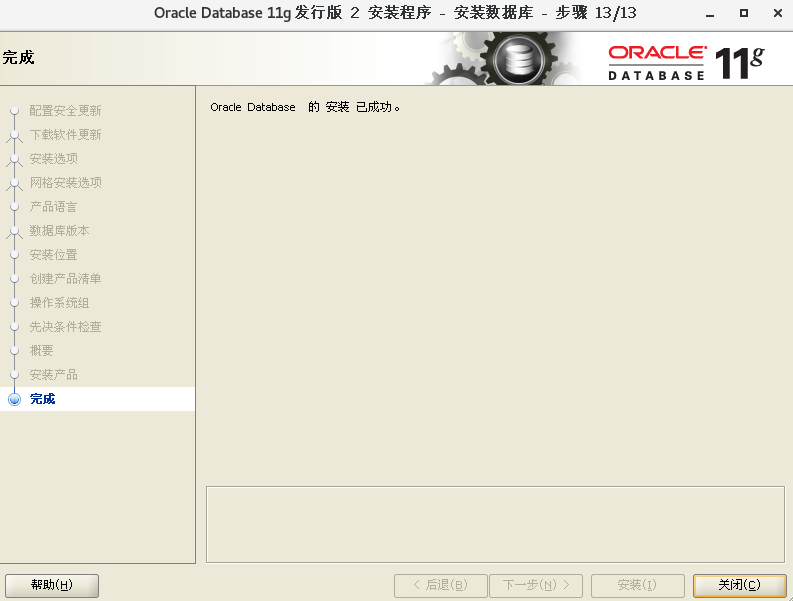
安装完成
安装完成后重启主机
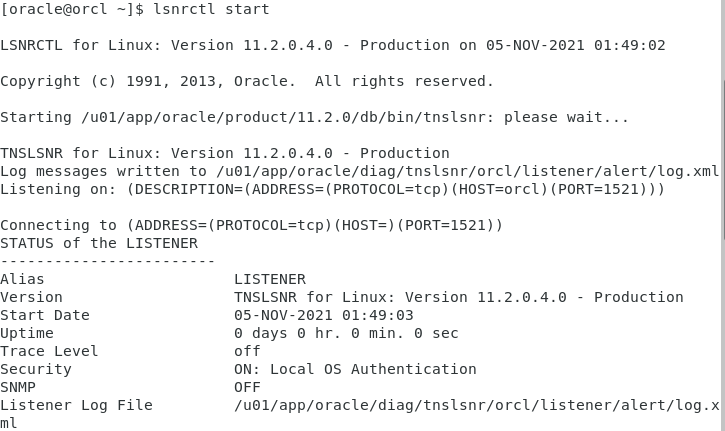
创建数据库 打开监听 1 2 3 su - oracle lsnrctl start lsnrctl status
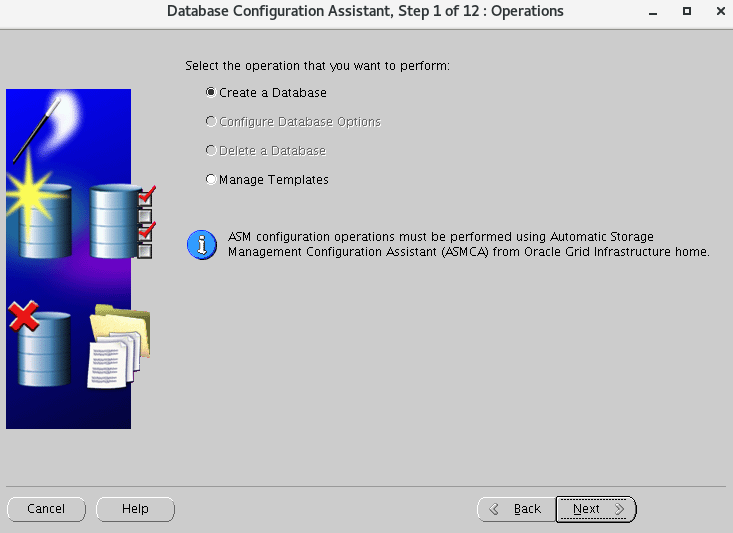
打开配置工具
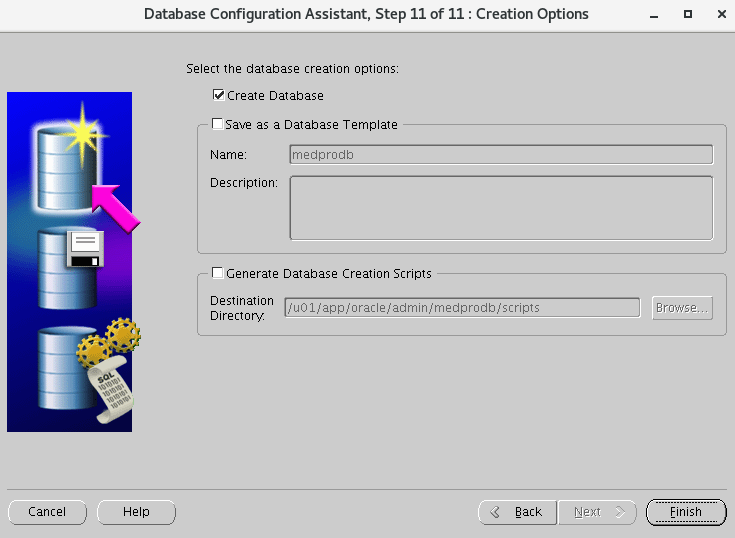
创建数据库
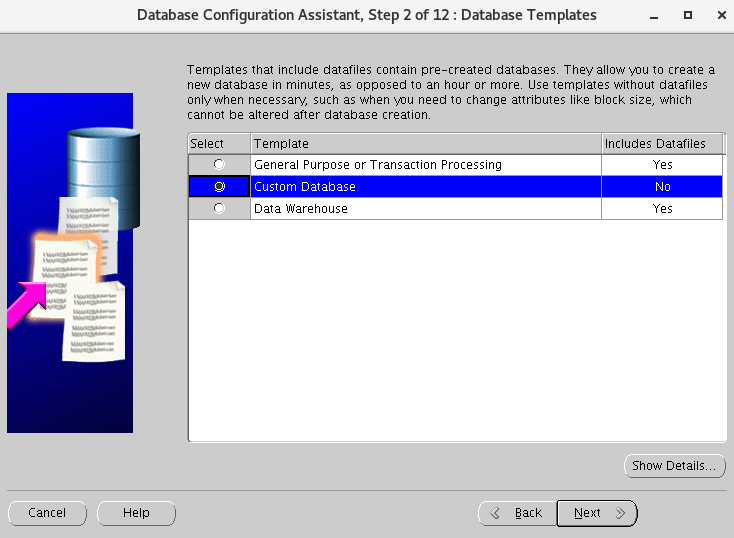
自定义模式
实例名
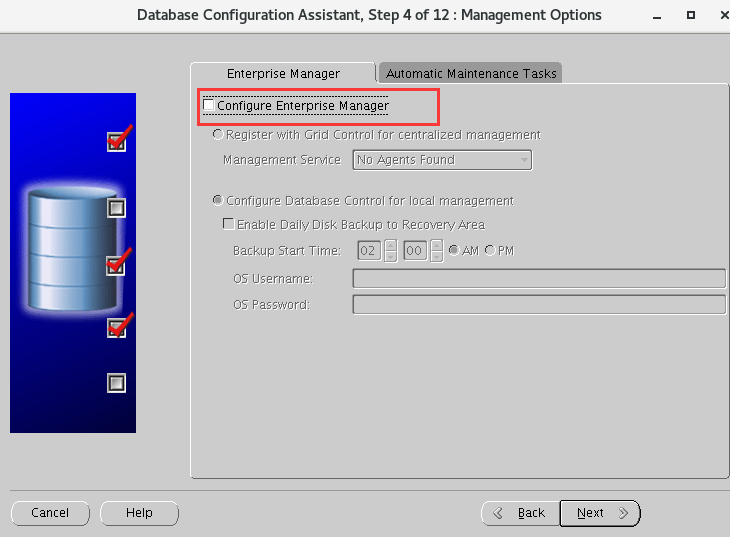
EM
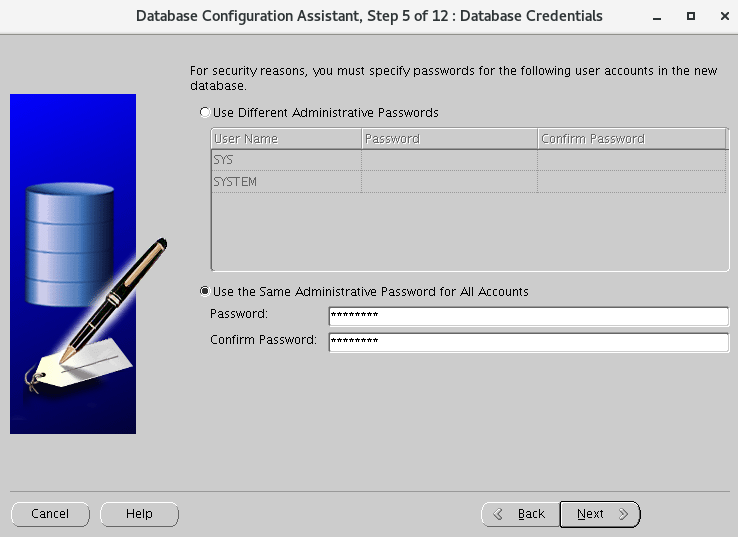
使用统一密码
P@ssw0rd
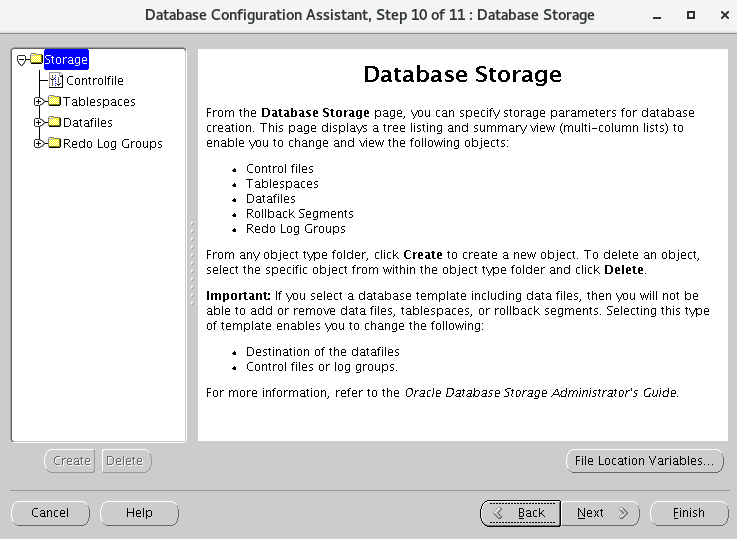
使用建好的数据文件保存地址
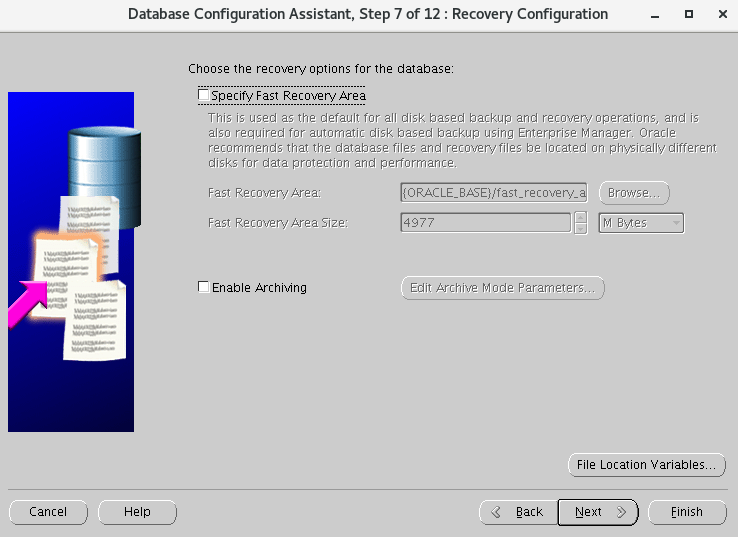
关闭闪回和归档
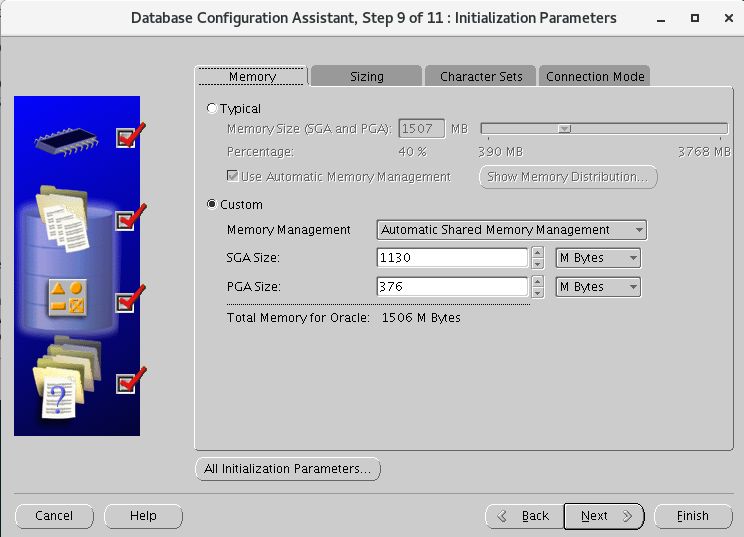
内存分配
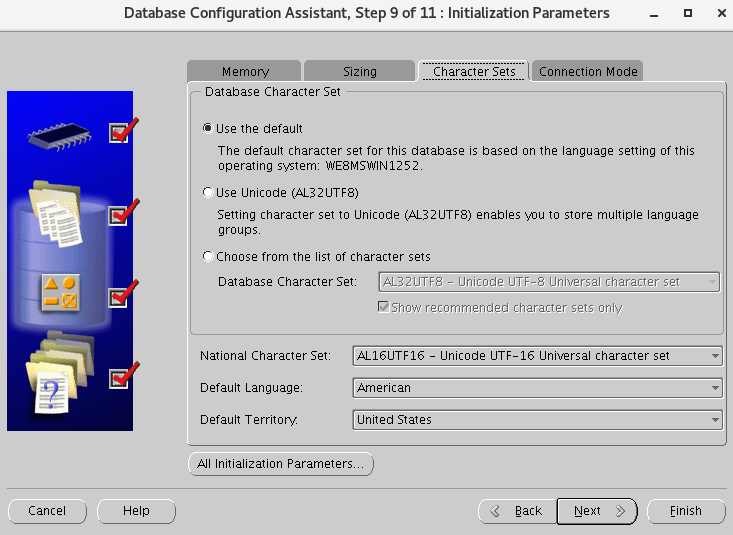
字符集配置
下一步
下一步
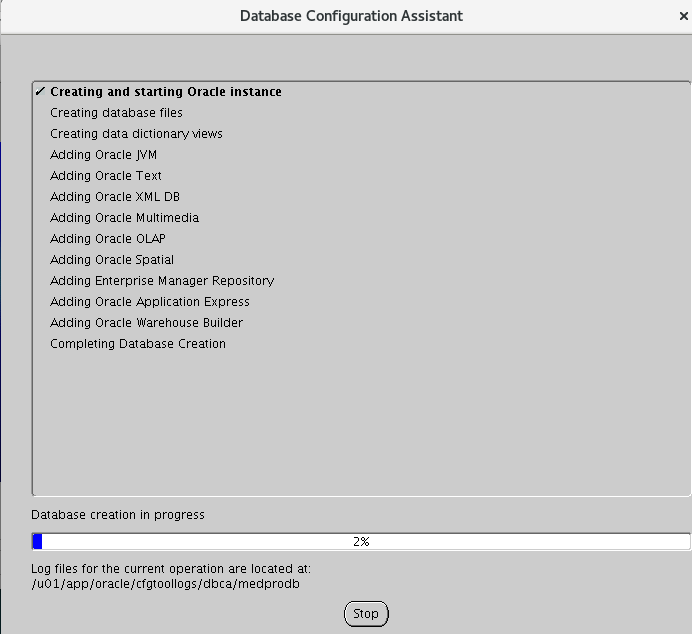
等待创建完成
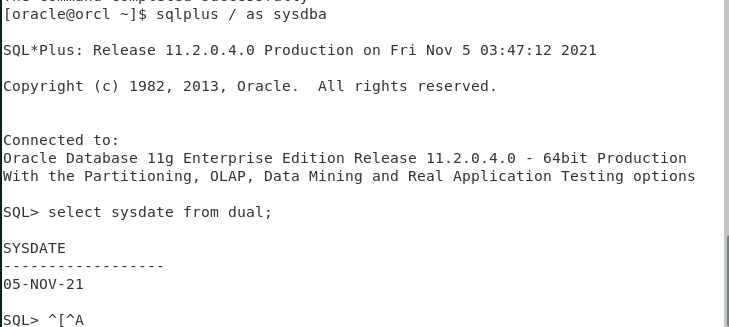
连接数据库 1 2 3 4 5 6 7 8 9 10 11 12 13 14 15 16 17 18 19 20 21 22 23 24 25 26 27 28 29 30 31 32 33 34 su - oracle sqlplus / as sysdba ## 重启后启动数据库 startup shutdown immediate; # 关闭数据库 $ echo $ORACLE_SID .... $ echo $ORACLE_HOME .... $ ps - ef | grep smon ora_smon_InfraDB $ ORACLE_SID= InfraDB $ ORACLE_HOME= / u01/ app/ oracle/ product/ 12.2 .0 .1 / dbhome_1 $ lsnrctl status $ lsnrctl start select * from v$database;##创建数据库用户 create user test identified by test;grant dba to test; # RESOURCEcommit ;grant create session to testconn test/ test ##创建表 create table student (id number not null ,name varchar2(100 ));insert into student values (1 ,'jonty' );commit ;
注意 :如果执行SQL命令ORA-01034: ORACLE not available ,可能是实例ID对不上
1 2 3 4 5 echo $ORACLE_SID -- 查看当前实例 echo $ORACLE_HOME -- 安装目录 ORACLE_SID=medprodb -- 设置
数据库补丁安装 上传补丁 上传PSU文件夹到/soft目录下并解压
p6880880_112000_Linux-x86-64.zip
关闭数据库服务 停掉所有数据库服务
1 2 3 4 5 6 lsnrctl stop # 关闭监听 emctl stop dbconsole; # 关闭EM shutdown immediate; # 关闭数据库
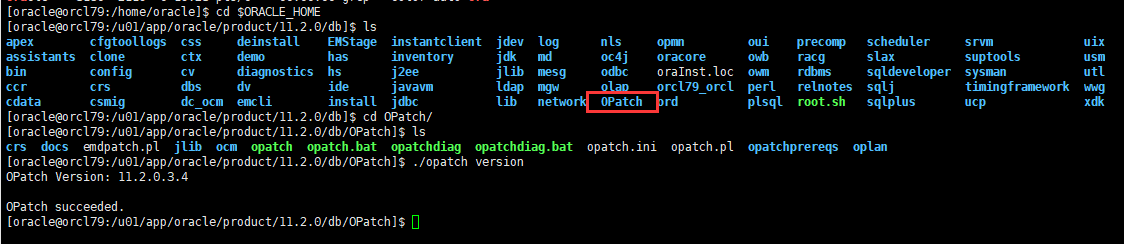
替换OPatch 替换OPatch 工具
1 2 3 cd $ORACLE_HOME cd /OPatch ./opatch version
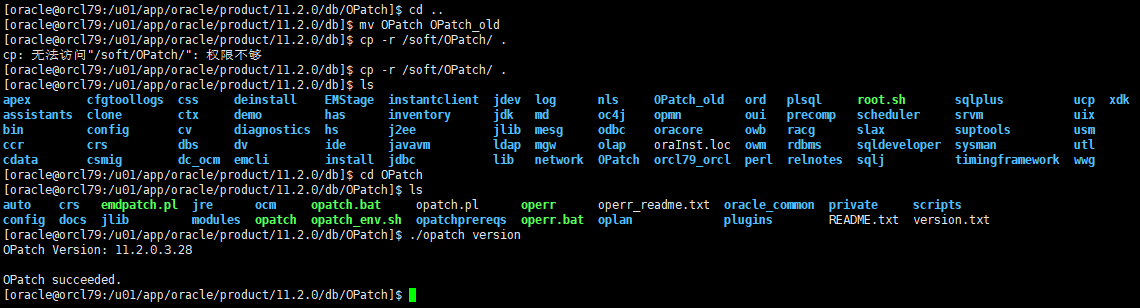
1 2 mv Opatch OPatch_old # 备份 cp -r /soft/Opatch . # 复制
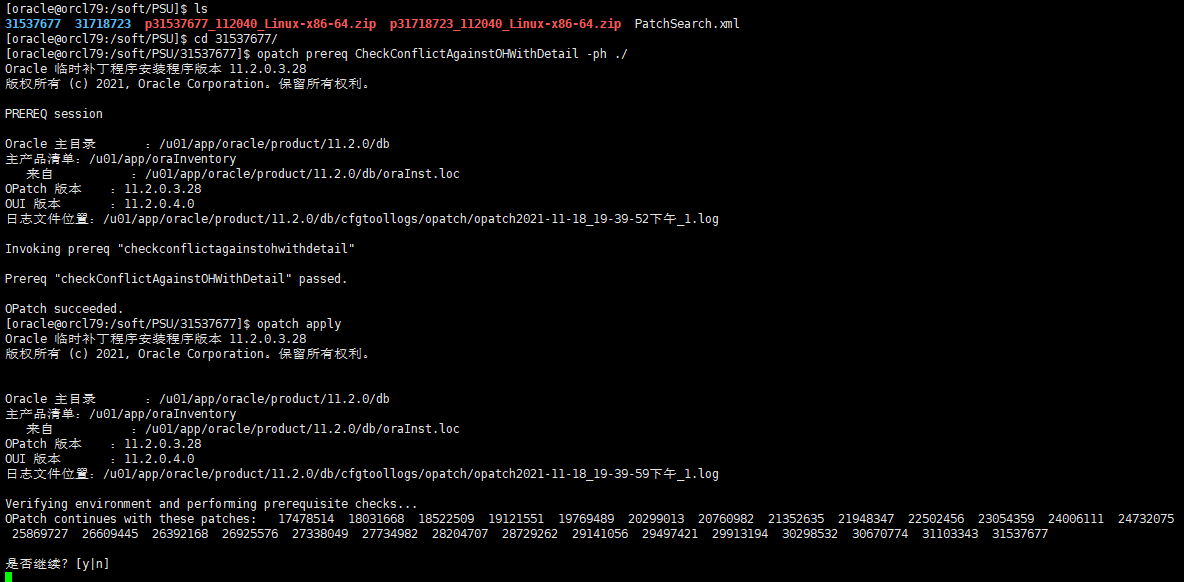
执行补丁脚本 进入补丁目录
查看README.html文档
1 2 3 4 5 6 opatch prereq CheckConflictAgainstOHWithDetail -ph ./ opatch apply # 如果OPatch failed with error code 73 ps -ef|grep smon kill -9 进程id
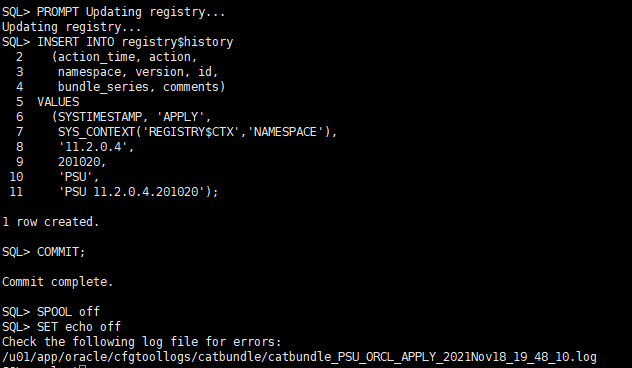
1 2 3 4 5 6 7 opatch lsinventory # 查看 cd $ORACLE_HOME/rdbms/admin sqlplus / as sysdba startup # 启动 @catbundle.sql psu apply # 执行脚本 @utlrp.sql
重启数据库
1 2 shutdown immediate; startup;
基础维护 关闭密码过期 1 2 select * from dba_profiles where profile = 'DEFAULT' ; # 查看alter profile default limit PASSWORD_LIFE_TIME UNLIMITED;
参数 1 2 show parameter audit; # 审计alter system set audit_trail = none scope = spfile;
1 2 3 4 5 6 7 8 select name from v$datafile; # 查看数据文件show parameter sga; # 查看sgashow parameter pga; # 查看pgashow parameter proc; # 进程数
1 2 show parameter open ; # 游标alter system set open_cursors = 2000 scope = spfile;
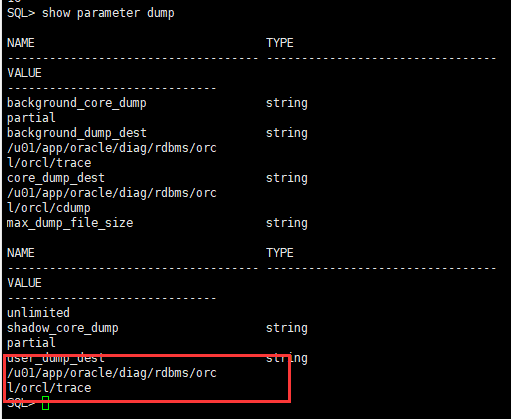
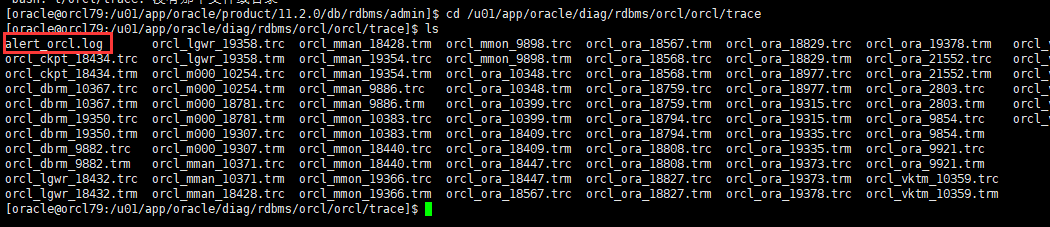
警告日志 1 2 show parameter dumpcd / u01/ app/ oracle/ diag/ rdbms/ orcl/ orcl/ trace
归档日志 1 2 3 4 5 6 7 8 9 10 archive log list; show parameter recover;alter system set db_recovery_file_dest_size= 5 g;alter system set db_recovery_file_dest = '/archive' ;shutdown immediate; startup mount; alter database archivelog;archive log list; alter database open ;
配置完成后关闭,迁移数据后生产再打开
1 2 3 4 shutdown immediate; startup mount; alter database noarchivelog;alter database open ;
备份一下
1 2 # root用户 tar zcvf oracle.tar.gz /u01/app/oracle