在系列教程中,我们会构建一个基于ABP的Web应用程序,用于管理书籍及其作者列表
使用到的技术:
Entity Framework Core
Angular
本教程分为以下部分:
创建解决方案 在开始开发之前,请先按照让项目跑起来 创建项目
创建Book实体 项目中的领域层 分为两个项目:
Acme.BookStore.Domain:实体、领域服务Acme.BookStore.Domain.Shared:共享的常量、枚举
这里相较于原有ASP.NET Boilerplate多了.Domian.Shared项目,相当于向上抽取一层,实际上是领域服务的一部分,其他项目都会使用到,该项目不依赖解决方案中的其他项目,其他项目直接或间接依赖该项目。
例如 BookType 枚举和 BookConsts 类 (可能是 Book 实体用到的常数字段,像MaxNameLength)都适合放在这个项目中。
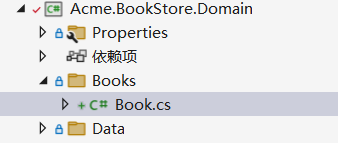
在领域层中定义实体,在.Domain项目中创建一个Books文件夹,添加一个Book的类
1
2
3
4
5
6
7
8
9
10
11
12
13
14
15
16
using System;using System.ComponentModel.DataAnnotations.Schema;using Volo.Abp.Domain.Entities.Auditing;namespace Acme.BookStore.Books ;public class Book : AuditedAggregateRoot <Guid >{ public string Name { get ; set ; } public BookType Type { get ; set ; } public DateTime PublishDate { get ; set ; } public float Price { get ; set ; } }
ABP为实体提供了两个基类:AggregateRoot和Entity
1 2 3 4 5 6 7 8 9 10 11 12 13 14 15 16 17 18 19 20 21 22 23 24 25 26 27 28 29 30 31 32 33 34 35 36 37 38 39 40 41 42 43 public abstract class AggregateRoot <TKey > : BasicAggregateRoot <TKey >, IHasExtraProperties , IHasConcurrencyStamp { public virtual ExtraPropertyDictionary ExtraProperties { get ; protected set ; } [DisableAuditing ] public virtual string ConcurrencyStamp { get ; set ; } protected AggregateRoot ( { ConcurrencyStamp = Guid.NewGuid().ToString("N" ); ExtraProperties = new ExtraPropertyDictionary(); this .SetDefaultsForExtraProperties(); } protected AggregateRoot (TKey id ) : base (id ) { ConcurrencyStamp = Guid.NewGuid().ToString("N" ); ExtraProperties = new ExtraPropertyDictionary(); this .SetDefaultsForExtraProperties(); } } public abstract class Entity <TKey > : Entity , IEntity <TKey >{ public virtual TKey Id { get ; protected set ; } = default !; protected Entity ( { } protected Entity (TKey id ) { Id = id; } }
Aggregate Root 是领域驱动设计的一个概念,可视为可直接查询和处理的根实体,AggregateRoot 类实现了 IHasExtraProperties 和 IHasConcurrencyStamp 接口,这为派生类带来了两个属性 IHasExtraProperties和 IHasConcurrencyStamp
IHasExtraProperties: 使实体可扩展 IHasConcurrencyStamp:添加了由ABP框架管理的 ConcurrencyStamp 属性实现乐观并发
ConcurrencyStamp通过比较前后不同的Token值校验一致性
如果不需要这些功能,聚合根可以继承 BasicAggregateRoot<TKey>(或BasicAggregateRoot)
Book实体继承AuditedAggregateRoot类在AggregateRoot的基础上新增了基础审计信息,如CreationTime、CreatorId、LastModificationTime等,框架自动处理这些审计信息,AuditedAggregateRoot<Guid>是泛型的,<Guid>定义了实体的主键类型
BookType枚举 Book实体引用了BookType枚举类,在.Domain.Shared项目中创建Books文件夹,并创建BookType枚举类
1
2
3
4
5
6
7
8
9
10
11
12
13
14
15
16
17
namespace Acme.BookStore.Books ;public enum BookType{ Undefined, Adventure, Biography, Dystopia, Fantastic, Horror, Science, ScienceFiction, Poetry }
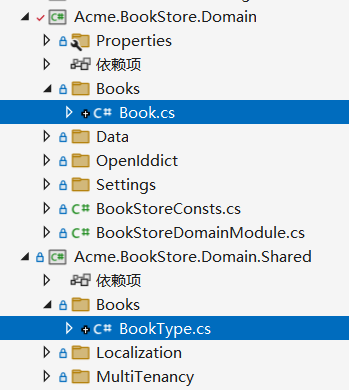
最终文件目录如下:
实体注册 EF Core需要将实体注册到DbContext中,在.EntityFrameworkCore项目BookStoreDbContext.cs中注册
1
2
3
4
5
6
7
8
9
public class BookStoreDbContext : AbpDbContext <BookStoreDbContext >, IIdentityDbContext , ITenantManagementDbContext { public DbSet<Book> Books { get ; set ; } }
其他的类注册都来自于模块中
配置实体映射 在OnModelCreating方法中配置实体映射代码
1
2
3
4
5
6
7
8
9
10
11
12
13
14
15
16
17
18
19
20
21
22
23
24
25
namespace Acme.BookStore.EntityFrameworkCore ;public class BookStoreDbContext : AbpDbContext <BookStoreDbContext >, IIdentityDbContext , ITenantManagementDbContext { protected override void OnModelCreating (ModelBuilder builder ) { base .OnModelCreating(builder); builder.Entity<Book>(b => { b.ToTable(BookStoreConsts.DbTablePrefix + "Books" , BookStoreConsts.DbSchema); b.ConfigureByConvention(); b.Property(x => x.Name).IsRequired().HasMaxLength(128 ); }); } }
BookStoreConsts:定义系统常量值,这里定义DbTablePrefix用于配置映射到数据库表的前缀,不强制使用,建议在统一的地方控制,保持一致性且易于后期维护ConfigureByConvention:自动配置映射关系,通过依赖约定配置,减少了手动配置的繁琐工作
为什么不直接配置实体字段属性?
ABP框架使用Fluent API配置映射关系是为了实现更好的解耦、灵活性和可维护性。通过集中管理映射配置,避免代码污染,并支持复杂映射关系,Fluent API为开发者提供了强大的工具来处理实体与数据库之间的映射。
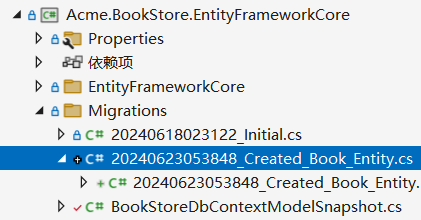
添加数据迁移 新增实体或修改数据库映射配置后,需要创建一个新的迁移并更新到数据库,以保证实体与表字段保持一致。
两种方式新增数据库迁移:
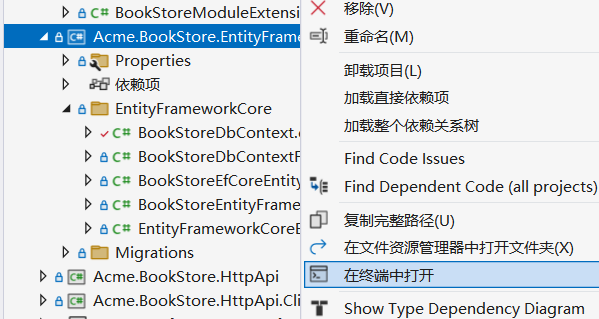
1、终端命令行,右键.EntityFrameworkCore项目,选择在终端中打开
输入以下命令:
1 dotnet ef migrations add Created_Book_Entity
输出如下:
1
2
3
4
5
Acme.BookStore.EntityFrameworkCore> dotnet ef migrations add Created_Book_Entity Build started... Build succeeded. The Entity Framework tools version '6.0.8' is older than that of the runtime '8.0.0' . Update the tools for the latest features and bug fixes. See https://aka.ms/AAc1fbw for more information. Done. To undo this action, use 'ef migrations remove'
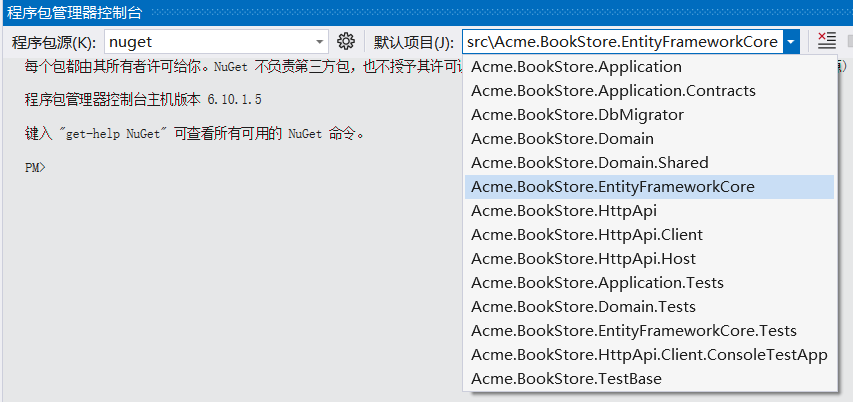
2、使用程序包管理控制台(PMC)
打开程序包管理控制台,并选择项目为.EntityFrameworkCore项目
输入命令:
1 Add-Migration Created_Book_Entity
第二种方式需要在启动项目中新增Microsoft.EntityFrameworkCore.Design包
种子数据 在.Domain项目中创建BookStoreDataSeederContributor.cs,继承自IDataSeedContributor,代码如下:
1
2
3
4
5
6
7
8
9
10
11
12
13
14
15
16
17
18
19
20
21
22
23
24
25
26
27
28
29
30
31
32
33
34
35
36
37
38
39
40
41
42
43
44
45
46
47
48
using System;using System.Threading.Tasks;using Acme.BookStore.Books;using Volo.Abp.Data;using Volo.Abp.DependencyInjection;using Volo.Abp.Domain.Repositories;namespace Acme.BookStore { public class BookStoreDataSeederContributor : IDataSeedContributor , ITransientDependency { private readonly IRepository<Book, Guid> _bookRepository; public BookStoreDataSeederContributor (IRepository<Book, Guid> bookRepository ) { _bookRepository = bookRepository; } public async Task SeedAsync (DataSeedContext context ) { if (await _bookRepository.GetCountAsync() <= 0 ) { await _bookRepository.InsertAsync( new Book { Name = "三体" , Type = BookType.Dystopia, PublishDate = new DateTime(1949 , 6 , 8 ), Price = 19.84f }, autoSave: true ); await _bookRepository.InsertAsync( new Book { Name = "The Hitchhiker's Guide to the Galaxy" , Type = BookType.ScienceFiction, PublishDate = new DateTime(1995 , 9 , 27 ), Price = 42.0f }, autoSave: true ); } } } }
如果数据库表中没有图书数据则创建种子数据,使用IRepository<Book, Guid>
在运行应用程序之前最好将初始数据添加到数据库中
更新数据库 通过执行迁移以更新迁移文件到数据库,以保证实体与表字段保持一致。
同添加数据迁移 ,更新迁移数据有相同方式
1、通过命令行执行迁移
1 dotnet ef database update
2、通过程序包管理控制台(PMC)
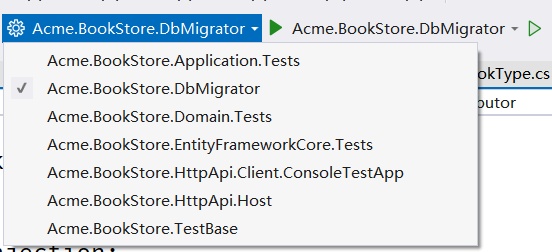
ABP提供了.DbMigrator控制台应用程序用来执行迁移操作和初始化种子数据:
将.DbMigrator项目设为启动项目并启动
1
2
3
4
5
6
[13:55:54 INF] Started database migrations... [13:55:54 INF] Migrating schema for host database... [13:55:57 INF] Executing host database seed... [13:55:59 INF] Successfully completed host database migrations. [13:56:03 INF] Successfully completed all database migrations. [13:56:03 INF] You can safely end this process...
迁移完成,在数据库中查询
1
2
select * from __EFMigrationsHistoryselect * from AppBooks
可以看到,迁移记录和种子数据已创建
创建应用服务 应用服务层包含两个项目:
.Application.Contracts:包含DTO和应用服务接口定义.Application:包含应用服务实现
在这部分,将创建一个应用服务,使用ABP Framework的CrudAppService基类实现对Book的增删改查操作
BookDto CrudAppService基类需要定义实体的基本DTO,在.Application.Contracts项目中创建Books文件夹并添加BookDto.cs
DTO:Data Transfer Object 数据传输对象,用与应用层和表示层的数据传输,确保数据传输的安全性并减少冗余,减少不必要的数据传输以提高性能
定义BookDto用于传输在用户界面展示的书籍信息
BookDto继承自AuditedEntityDto<Guid>,同定义实体一样,定义审计信息,减少重复工作
1
2
3
4
5
6
7
8
9
10
11
12
13
14
15
using System;using Volo.Abp.Application.Dtos;namespace Acme.BookStore.Books ;public class BookDto : AuditedEntityDto <Guid >{ public string Name { get ; set ; } public BookType Type { get ; set ; } public DateTime PublishDate { get ; set ; } public float Price { get ; set ; } }
在将书籍返回到表示层时,需要将Book实体转换为BookDto对象,AutoMapper 库可以在定义了正确的映射时自动执行转换,启动模板配置了AutoMapper,在.Application项目的BookStoreApplicationAutoMapperProfile.cs中配置映射关系。
1
2
3
4
5
6
7
8
9
10
11
12
13
14
15
using Acme.BookStore.Books;using AutoMapper;namespace Acme.BookStore ;public class BookStoreApplicationAutoMapperProfile : Profile { public BookStoreApplicationAutoMapperProfile ( { CreateMap<Book, BookDto>(); } }
CreateUpdateBookDto 新增CreateUpdateBookDto.cs,用于在创建或更新书籍的时候从用户界面传输图书信息。
这里定义了数据注释特性(如[Required])来定义属性的验证规则,DTO由ABP框架自动验证。
1
2
3
4
5
6
7
8
9
10
11
12
13
14
15
16
17
18
19
20
21
using System.ComponentModel.DataAnnotations;using System;namespace Acme.BookStore.Books ;public class CreateUpdateBookDto { [Required ] [StringLength(128) ] public string Name { get ; set ; } [Required ] public BookType Type { get ; set ; } = BookType.Undefined; [Required ] [DataType(DataType.Date) ] public DateTime PublishDate { get ; set ; } = DateTime.Now; [Required ] public float Price { get ; set ; } }
配置实体映射关系:
1
2
3
4
5
6
7
8
public class BookStoreApplicationAutoMapperProfile : Profile { public BookStoreApplicationAutoMapperProfile ( { CreateMap<Book, BookDto>(); CreateMap<CreateUpdateBookDto, Book>(); } }
IBookAppService 定义应用服务接口,在.Application.Contracts项目中创建Books文件夹,并添加IBookAppService接口
定义应用服务接口不是必须的,但建议作为最佳实践
ICrudAppService定义了常见的CRUD 方法:GetAsync,GetListAsync,CreateAsync,UpdateAsync和DeleteAsync,也可以从空的IApplicationService接口继承并手动定义自己的方法。ICrudAppService中使用不同的DTO进行创建和更新
1
2
3
4
5
6
7
8
9
10
11
12
13
14
using System;using Volo.Abp.Application.Dtos;using Volo.Abp.Application.Services;namespace Acme.BookStore.Books ;public interface IBookAppService : ICrudAppService < //Defines CRUD methods BookDto , //Used to show books Guid , //Primary key of the book entity PagedAndSortedResultRequestDto , //Used for paging /sorting CreateUpdateBookDto > { }
BookAppService 实现IBookAppService接口,在.Application项目中创建Books文件夹,并添加BookAppService类
1
2
3
4
5
6
7
8
9
10
11
12
13
14
15
16
17
18
19
20
21
using System;using Volo.Abp.Application.Dtos;using Volo.Abp.Application.Services;using Volo.Abp.Domain.Repositories;namespace Acme.BookStore.Books ;public class BookAppService : CrudAppService < Book , //The Book entity BookDto , //Used to show books Guid , //Primary key of the book entity PagedAndSortedResultRequestDto , //Used for paging /sorting CreateUpdateBookDto >, IBookAppService { public BookAppService (IRepository<Book, Guid> repository ) : base (repository ) { } }
BookAppService继承了CrudAppService<...>,并实现了 ICrudAppService 定义的CRUD方法.BookAppService注入IRepository <Book,Guid>,这是Book实体的默认仓储. ABP自动为每个聚合根(或实体)创建默认仓储BookAppService使用IObjectMapper将Book对象转换为BookDto对象,将CreateUpdateBookDto对象转换为Book对象
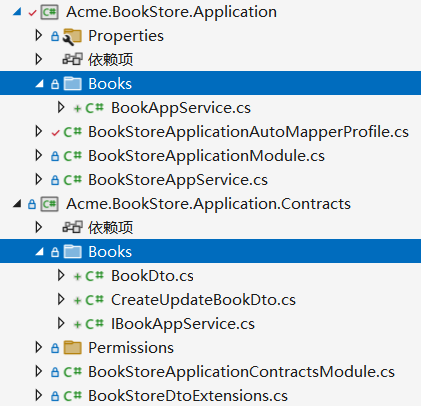
目录如图:
自动生成API Controllers 在普通的ASP.NET Core应用程序中,通过创建API Controller 将应用程序服务公开为HTTP API 端点。提供给浏览器或第三方客户端通过HTTP调用。
ABP可以自动按照约定将应用程序服务配置为MVC API控制器,配置如下:
1 2 3 4 5 6 7 8 9 10 11 12 13 [DependsOn(BookStoreApplicationModule) ] public class BookStoreWebModule : AbpModule { public override void PreConfigureServices (ServiceConfigurationContext context ) { PreConfigure<AbpAspNetCoreMvcOptions>(options => { options .ConventionalControllers .Create(typeof (BookStoreApplicationModule).Assembly); }); } }
Swagger UI 启动模板使用Swashbuckle.AspNetCore 运行swagger UI 。
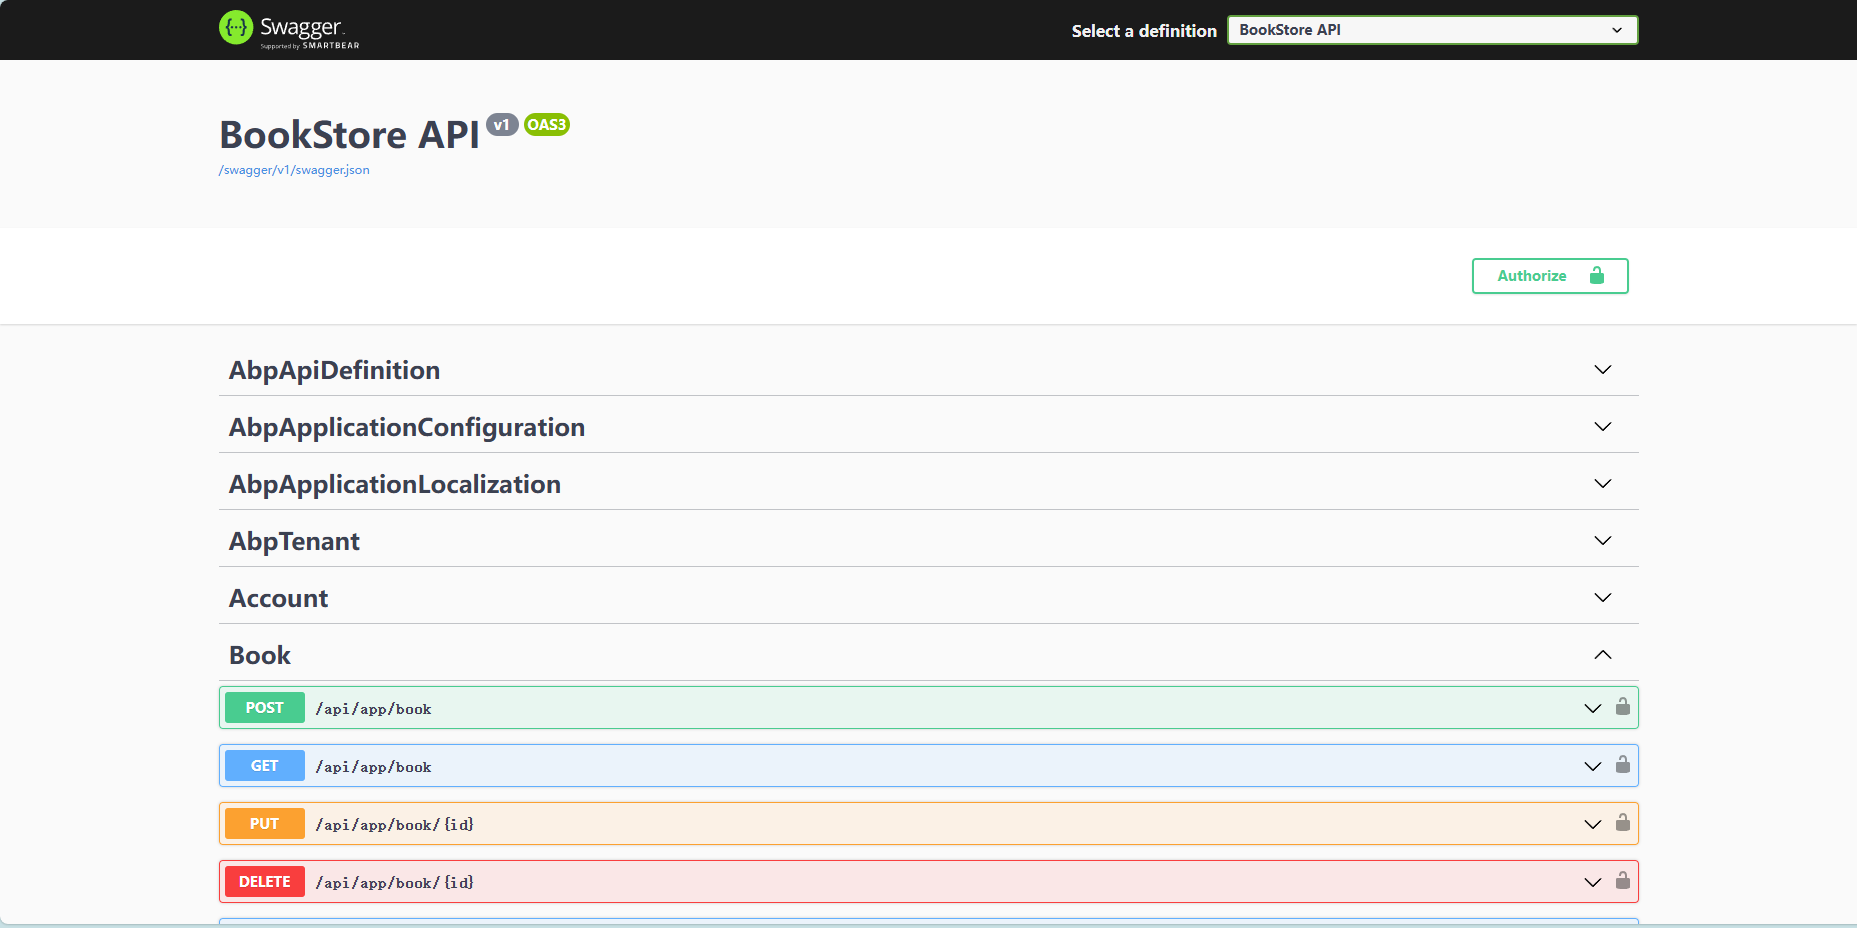
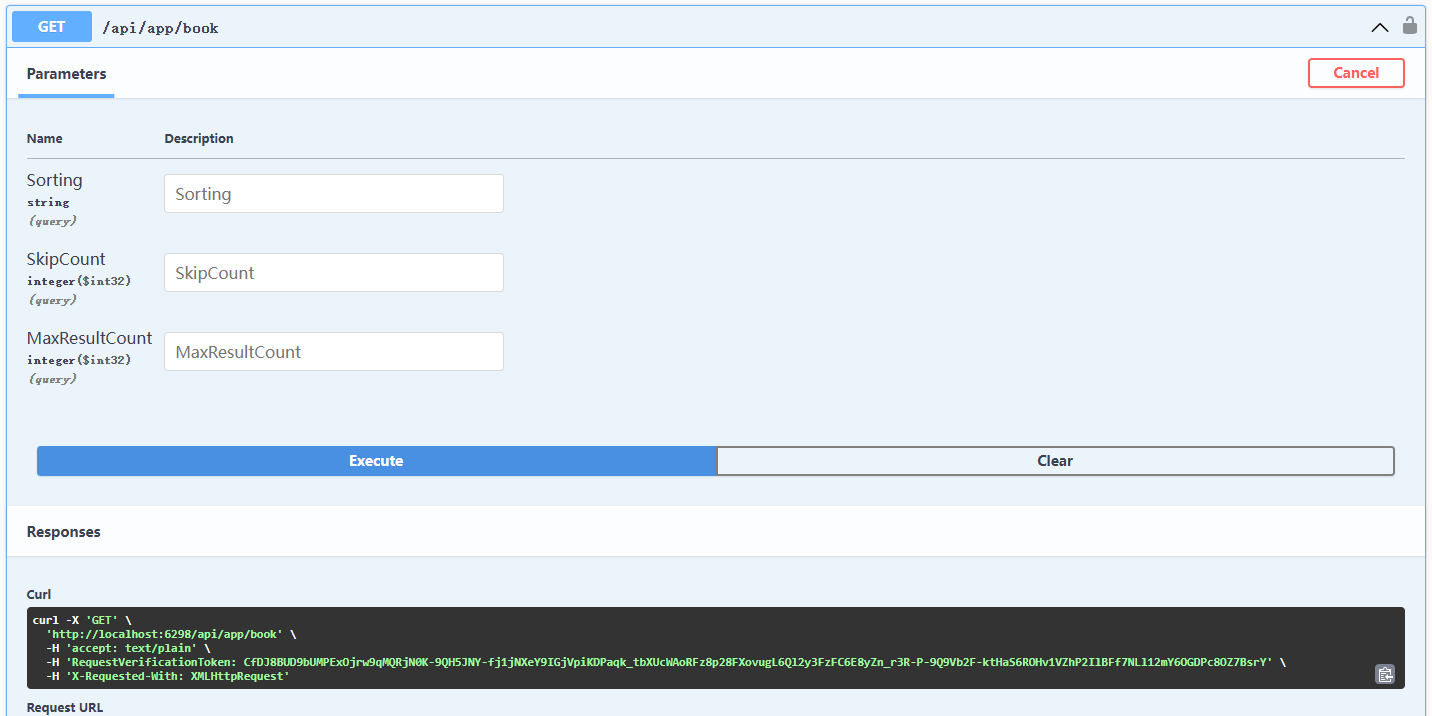
将.HttpApi.Host设为启动项目,并使用Crtl+f5运行,启动后打开浏览器访问https://localhost:<port>/swagger/
使用SwaggerUI测试接口
点击执行,返回数据如下:
1
2
3
4
5
6
7
8
9
10
11
12
13
14
15
16
17
18
19
20
21
22
23
24
25
26
27
{ "totalCount" : 2 , "items" : [ { "name" : "盗墓笔记" , "type" : 1 , "publishDate" : "2005-09-27T00:00:00" , "price" : 42 , "lastModificationTime" : null , "lastModifierId" : null , "creationTime" : "2024-06-23T13:55:59.2354244" , "creatorId" : null , "id" : "afddb57d-1d66-d271-3bdb-3a1355d73e82" }, { "name" : "1984" , "type" : 7 , "publishDate" : "2000-06-08T00:00:00" , "price" : 19.84 , "lastModificationTime" : null , "lastModifierId" : null , "creationTime" : "2024-06-23T13:55:58.9727875" , "creatorId" : null , "id" : "d589b899-4033-3f76-9eea-3a1355d73d55" } ] }
到这里我们就完成了基于ABP的后端服务接口学习
下一节 教程下一节
